
7.0 Questions on 70mm Projection! |
Read more
at in70mm.com The 70mm Newsletter |
| Written by: Duncan McGregor and Brian Guckian | Date: 23 August 2006 |
|
"What should a 35mm projectionist new to 70mm look out for?"
Answer: The obvious one is the fact that you are dealing with a larger format, so more care should always be applied at all times when handling this film gauge. Also if a projectionist is new to the format for the first time, then it’s essential they are given training by a qualified professional before attempting to handle it, as it is markedly different from 35mm. The other major difference is the bigger frame which is 5 perforations high, as opposed to 4 perforations for 35mm. Until recently all 70mm prints had magnetic striping for sound reproduction, but with the advent of DTS a major difference is now noted in the projection room, as the film runs through the projector more quietly and there is visibly much less dirt and deposit to clean on the projector, as a result of oxide no longer peeling from the magnetic tracks. The speed is 112,5 feet per minute, so tab cues and automation mark placements will be different. Another major difference owing to the larger gauge is the overall weight of a 70mm print or individual reel, so it is advisable to use trolleys, hoists or mechanical aids where available, to avoid excessive lifting and potential injury to ones self. "Tell us about de-gaussing issues when screening 70mm prints". Answer: With the passage of time and less attention paid to magnetic sound heads in projection rooms, there has been a small but significant increase in the amount of magnetic prints suffering from contamination, with regard noise interference of one or more tracks becoming “magged up”. The result is an annoying click or crackle on the track, which is impossible to remove once there. Unplugging the offending speaker or switching the appropriate amplifier off is the only solution. Therefore careful use of a demagnetiser across the sound head can help reduce this occurring. The damage usually occurs via other metal parts on the projector that the film comes into contact with such as rollers, sprockets and spindle shafts etc., so these should be demagnetised frequently as well. It’s therefore important that all parts of the film path from the platter if used are checked, that could cause this problem. However, proper training in the use of degaussing equipment is essential otherwise you can make the problem worse. "What tips do you have when operating DTS-70? For instance, we have heard the Reader must be exactly aligned each time to cater for slightly different timecode track positions". Answer: I’ve only ever been aware of the time code being placed in a different position to normal for DTS-70 on one occasion. This was when we screened "Independence Day" (ID4),’ therefore we had to borrow the alternative reader from DTS in order to enable this. Other than that the time code is always in the same place, so no adjustments should really be necessary, though a yearly service by qualified engineers is always helpful, to check and test out the various sound systems. The key change that needs to be remembered is altering the time code offset from 35 to 70mm. This will also need amending if the print is shown at 30fps and if the sound has been authentically restored from original 6 channel mixes utilising the full compliment of 5 stage speakers (commonly referred to as special venue 6 channel), then the correct DTS processor is vital and some method for switching between 5.1 and special venue is essential. As the digital readers all use red LED’s, then some of these can fail from time to time and need replacing. Also if the voltage output of the LED’s falls below its required minimum, this will also result in problems with reading the track effectively. "Any special advice on make-up and break-down procedures?" 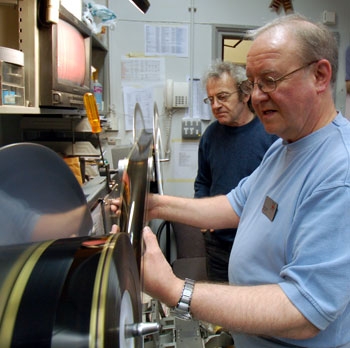 Roger
Brown and Tony Cutts. Image by Thomas Hauerslev Roger
Brown and Tony Cutts. Image by Thomas HauerslevAnswer: When making up 70mm prints, as much time as possible should be allowed to do this, as it takes time to adjust to its different size, feel and texture. Check each reel individually and make up the entire print, before assembling onto a plate machine for example. Always avoid visibly marking the print or reel edges with chinagraph pencil (as over time this will flake and contaminate the picture area). Similarly do not apply coloured insulation or masking tape etc to help identify reel changes. This is bad practice and needs stamping out. Also if doing reel change-overs, only use recognised cue dot markers. It is frustrating and annoying when older prints have several cue dots scratched on the ends of all reels, which visibly detracts from the overall presentation. Be sure to identify the correct ratio and sound format as there can be many options. With regard sound it’s vital the right format is selected. Up until the early '70s all prints were non-Dolby encoded – Format 40. With the introduction of Dolby encoded magnetic tracks there are two primary formats – 42 for standard Dolby and 43 for split surround. If the print has been equalised for SR reproduction, then appropriate sound cards need installing in the processor beforehand and Format 41 selecting to correspond. When spooling off all leaders and tails should be attached correctly to the appropriate reel. An increasing number of occurrences continue to happen with leaders and tails attached to the wrong reels. This creates confusion and frustration for the projectionist and adds to the overall time an operator has to spend on a print when received at the next venue. Leaders and tails should also be spliced as normal and never just wrapped round the end of a reel. As 70mm prints are very rarely printed these days, it’s vital that all projectionists treat these prints with the utmost care and respect, as replacement copies in the majority of cases are simply unavailable, so careful handling will help prolong the lifespan of this superior format. "How does tape splicing on 70mm differ from 35mm?" Answer: There is no real major difference with tape splicing, however butt splices should always be applied and made, and overlap joins avoided at all costs. Overlap joins are noisier, less flexible and more open to jumping in the gate. Also half inch wide tape or less is better for providing a smoother, quieter splice. Narrower tape also means that less of the magnetic track is covered which affects sound playback. Ideally the splice that covers the magnetic tracks should be trimmed so as not to cover them, using the template provided with some 70mm splicers. "Tell us something about changing from 35mm to 70mm on dual gauge machines, e.g. changing the gate, sprockets and pads, and installing a beam spreader?" Answer: Each make of projector is unique to itself, so practices will differ slightly. On a Cinemeccanica Victoria 8 projector, when changing from 35 to 70mm, you turn the pad roller round on its shaft. With a DP70 projector, you change the entire pad roller assembly. Heat shields may need to be removed and aperture plates and lenses have to be changed, as do the front and rear gate assemblies. Most 35/70 machines usually have dual purpose top and bottom sprockets, so these don’t have to be touched. However the intermittent sprocket usually does and it’s important that these are lined up and fitted correctly. Therefore read the manual relevant to your own projector and follow it carefully. Some projectionists forget to change the odd pad roller and this is where annoying, visible parallel scratches appear 35mm apart, running throughout the entire print if it has occurred operating from a plate machine, or on alternate parts if shown with reel changeovers. The beam spreader acts for light in a similar way to an anamorphic lens affecting the picture. It enables the spread of light horizontally to fill the 70mm aperture. Refer to your lamp house manual for installation instructions, but if it is put in the wrong way up, it will leave dark sides. The majority can be turned in their bracket in order to set them up correctly. The xenon lamp will need refocusing anyway to fill the aperture and this is best done with a white light on screen, so you can be sure of obtaining a uniform, even light distribution. "How do you think technical procedures for screening 5/70 prints could be improved?" Answer: If theatres are afforded the time to test run 70mm prints, then the majority of technical issues can usually be identified and ironed out beforehand, should they exist. A clean, tidy, well organised projection room will always benefit the projectionist and general smooth running of any show. Maintenance standards though need to be considerably higher where 70mm is in operation. There was never any standard sound level for magnetic prints, so each cinema needs to determine its own for every print that is shown, so it is best to run at least one reel if time allows. To help with this, from the '70s onwards, the majority of prints were released with a Dolby tone (and sometimes pink noise). This enabled the projectionist to run the tone and tweak the magnetic preamps to balance the channels for each film. Always check the film path through the projector when screening 70mm to be sure it is running free and clear of any obstructions. It is all too easy to be over confident and overlook obvious, potential pitfalls. Likewise check the film path from and back to the plate machine. Overtures, Play Ins, Play Outs and Intermissions should never be cut out of any print. They are there for specific reasons and aid greatly the majesty, grandeur and “road show” style presentations of such films. It is one thing to have an overture or play in cut out, which is there to build and create atmosphere for what is to follow, but deleting an intermission can often be disastrous. Intermissions are there more than just to aid the selling of popcorn – they often show the passage of time. For example in "El Cid" with the intermission cut out, this shows Charlton Heston change from a very young man to an old, bearded man in a split second. This confuses the audience, whereby they think part of the film has been cut, which of course it has – the intermission! |
More
in 70mm reading: 65/70mm Workshop Cinema Lists  The
Advanced Projection Manual is designed to
provide cinema engineers and projectionists with the
necessary technical know-how and hands-on advice so
that classic films can be presented the way they
were intended to be presented The
Advanced Projection Manual is designed to
provide cinema engineers and projectionists with the
necessary technical know-how and hands-on advice so
that classic films can be presented the way they
were intended to be presentedInternet link: 70mm 5-perf cinemas outside North America 70mm 5-perf cinemas in North America The 65/70mm Workshop extends its grateful thanks to Tony Cutts, Dick Vaughan and Symon Culpan of The National Museum of Photography, Film and Television, Pictureville, Bradford for their contributions to this section |
More on 70mm Film Handling... |
|
|
The
65/70mm workshop is grateful to also be able to publish this extract from
The
Advanced Projection Manual by Torkell
Sætervadet: General guidelines with regard to 35mm film handling naturally also apply to 70mm film. However, additional precautions should also be taken. Most 70mm film prints have magnetic sound tracks (indeed, virtually all prints do except very recent restorations or new films with the DTS time code for digital sound playback based on CD-ROM). These tracks, though more rugged than common belief would indicate, are sensitive to de-magnetisation. Any magnetic fields from motors, transformers, etc., have the potential to ruin the magnetic sound tracks, as do permanent magnets, including tools, scissors or parts made of magnetisable metals (steel, iron) that have been magnetised. 70mm film prints should never be kept or stored close to such magnetic fields. Furthermore, any parts of the rewind bench, the projector or the splicer which touch the film should be de-magnetised (degaussed) by a degaussing tool before 70mm film is handled. There are two types of degaussing tools available. The most commonly used is the "iron-type" tool suitable for degaussing small metal parts such as screws, shafts, sprockets, splicer knives etc. The other is the much bigger "coil-type", suitable for degaussing substantially bigger items such as the complete projector mechanism. It should be noted that the degaussing tool itself will ruin the magnetic tracks if it is close to the film when connected to the mains, so it is common sense to do the degaussing work prior to bringing any 70mm prints into the projection room. Seventy-millimetre film is almost exclusively distributed on spools rather than bobbins or cores. These spools, though compliant with most projector film transport systems, are intended for transport only. Because of rough handling in transit, most transport spools have severe dents or bent reel flanges. Also, transport spools are typically made slightly narrower than projection spools, as their main objective is to keep the film in place in transit. When used for projection, such spools have the potential to do severe damage to the film, both to the carrier base and to the sensitive magnetic sound tracks. When a 70mm film is prepared for projection, it should therefore be wound from the transport spools onto the cinema's own 70mm projection spools. When winding the film from the transport spool, it is strongly recommended that the winding is done very gently and that the film is slightly tilted by hand (holding only the edges) to prevent it from catching on any dents in the flanges of the transport spool. Another must is to ensure that the leaders are in good shape and of sufficient length. Because of the higher torque required to transport 70mm film (particualrly during acceleration), any minor perforation damage, poor splices, etc., could well cause problems during the start sequence of the reel. Though expensive, new 70mm leaders should be kept at hand and used whenever there is any doubt that the existing leader can cope. After all, it is a small investment if you consider it will not only ensure that performances go ahead smoothly, but will also protect the quality of very rare and expensive 70mm projection prints. Reproduced by kind permission of the Author (c) 2006 Torkell Saetervadet, The Norweigian Film Institute - Oslo and The International Federation of Film Archives (FIAF) - Brussels |
|
| Go: back
- top - back issues
- news index Updated 22-01-25 |
|